
Export all data from your current software.
Choose Export all data or the equivalent export or backup option in your current system. Download the files and keep them together with their original names.
If you receive a ZIP file, unzip it first. Keep the original download as your backup.
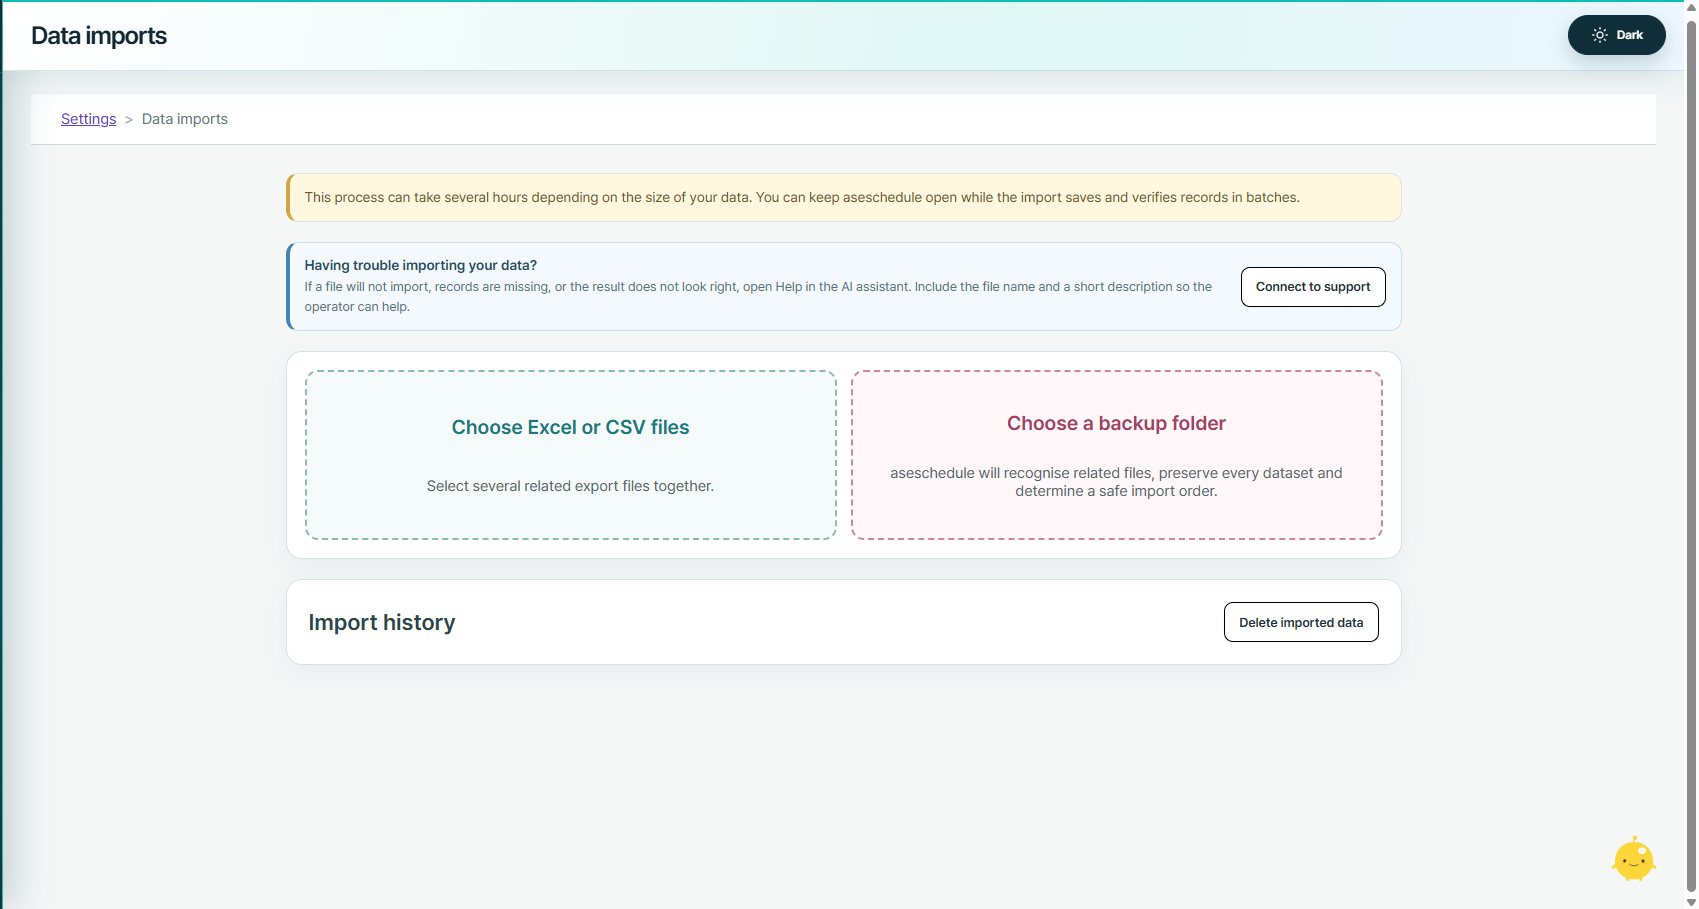
Select the whole folder in Data imports.
In ASE Schedule, go to Settings → Data imports. Click Choose a backup folder and select the entire unzipped export folder.
If you have individual CSV or Excel files, use Choose Excel or CSV files and select them all together.
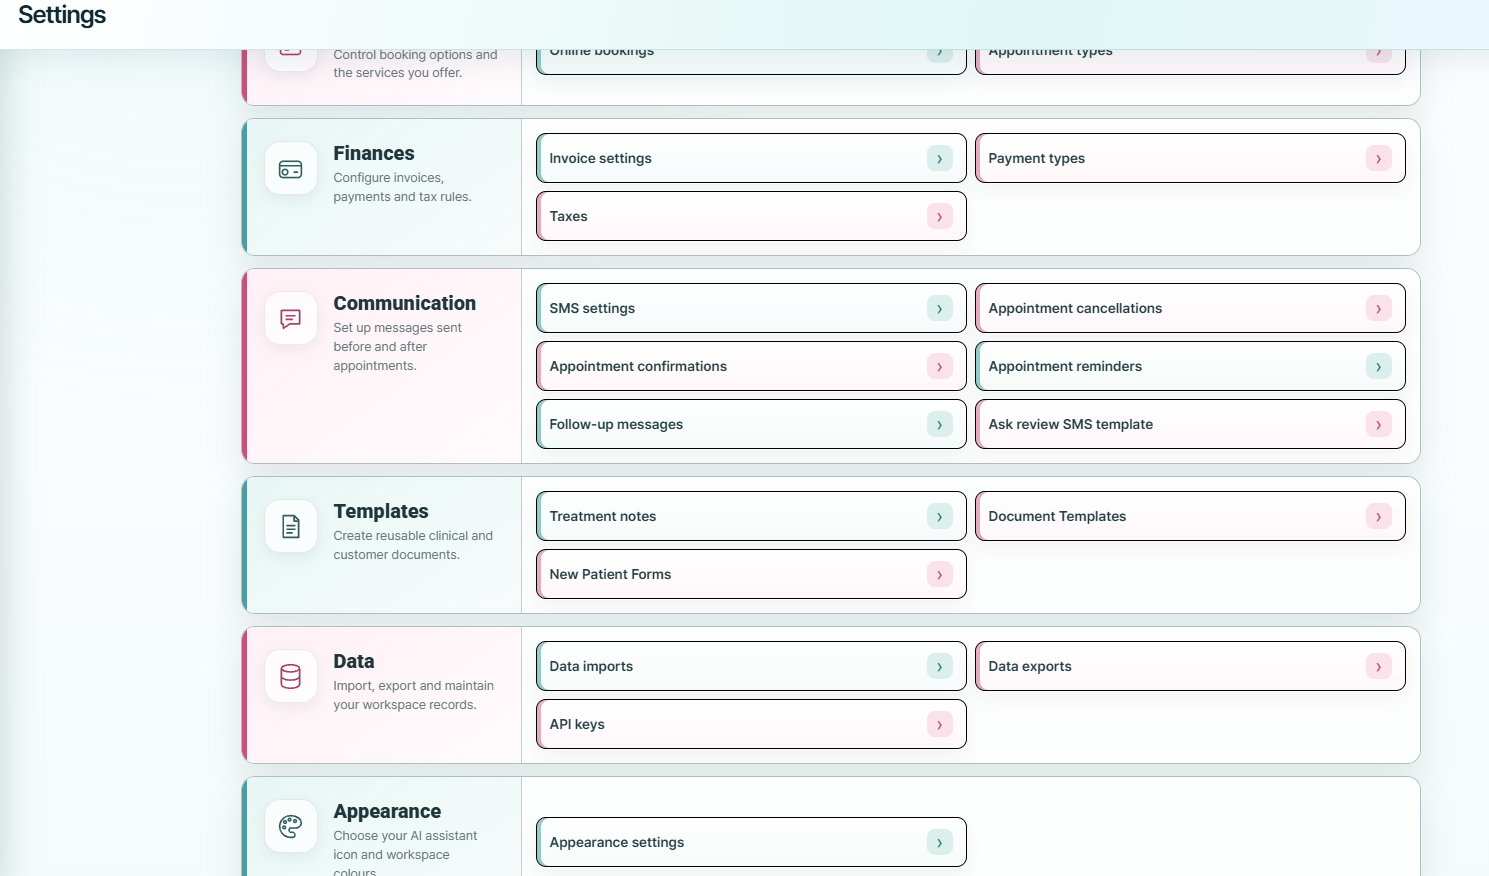
Where do I find Data imports?
Open Settings, scroll to the Data section and choose Data imports.
Review, then click Import.
ASE Schedule identifies supported files, suggests where each column belongs and chooses the import order. Check the suggestions under Review AI classification, then click Import [number] rows.
Keep ASE Schedule open until it finishes. Large imports can take several hours.
Afterwards, check Import history for skipped rows or warnings, and open a few patient records, appointments and invoices to confirm the results.
What should I check before clicking Import?
Check that each file has the right type under Import as, and that important fields such as names, IDs, dates and amounts point to the right columns. “Not mapped” means no column is selected for that field. If something looks wrong, correct it or use Connect to support before importing.
A few useful details
What files can I bring across?
CSV, TSV and Excel files (XLSX or XLS). Export formats vary between systems, so check the suggested file types and fields. Some supporting data is kept for reference rather than recreated in the app. Keep your original export until you have checked the results.
What about ZIP files and attachments?
Unzip your export before selecting the folder. Documents and images are not automatically restored to each patient’s Files area. Non-spreadsheet files over 12 MB retain file details only, not their contents. Keep the originals and ask support about moving attachments.
What if the import stops or something is missing?
Read the message and use Resume import if it is available in the same open session. If you closed or refreshed the tab, check Import history before starting again; some records may already be saved. Use Connect to support with the filename and what went wrong.
Migration help, before and after sign-up.
Supported data depends on your export format. Keep your original files and check the imported records before relying on them.